Copyrights @ Journal 2014 - Designed By Templateism - SEO Plugin by MyBloggerLab

Tampilkan postingan dengan label travel gadget. Tampilkan semua postingan

5 Januari 2016

, , , ,

REVIEW: SONY ACTION CAM


For me, traveling and an action cam have become inseparable. A small-but-tough camera has become a must bring item every time I travel.

A few months ago, I got a chance to use the Sony Action Cam 4K, FDR-X1000V to capture my trips. There is still a lot more to say about this action cam, but here are my thoughts on the Sony Action Cam based on my experience so far:

BODY


With slim dimensions (about 9cm x 5.5cm x 2.5cm), it took some time to adjust using the Sony Action Cam, but we can do framing easily with the Live-View Remote Kit that’s included in the box. We can set the mode —­ still image or video — and of course, record-and-stop using the small Live-View Remote Kit that looks like a hand watch, which makes recording adventure activities easier.

Meanwhile, for operation without the Live-View Remote Kit, Sony Action Cam has two buttons on the side, a record and hold button on top of the camera and the indicator screen is on its left. The Sony Action Cam will automatically turn on when we push any button.


CONNECTIVITY

One of the functions which makes using the Sony Action Cam a breeze is that the camera automatically pairs with our smartphone (we just have to set the password the first time) as long as the Wi-Fi on our smartphone is on, so we don’t have to open the Wi-Fi and connect again every time we want the Action Cam to pair with our other devices. It’s the same thing with the remote kit —­ as long as the Live-View Remote Kit is on, it'll connect with the Sony Action Cam. Also, if you turn off the Live-View Remote Kit, the Sony Action Cam will automatically turn off when not in use, saving battery power.

PHOTO


Equipped with a ZEISS® Tessar® Lens, images from the Sony Action Cam are sharper and clearer than ever before. We can get 8.8 MP (3952x2224) still images, or 2.1 MP photos from interval photo mode. What I like about this camera is when it takes interval photos, the images are still clear; on some other action cams, photos are blur because of movement while taking interval photos. Sony Action Cam’s SteadyShot electronic image stabilization makes photos sharp and clear even while taking underwater selfies :)


BEST PART: VIDEO

I think this is the BEST PART of the Sony Action Cam 4K; the quality from this small camera is fantastic! Yes, I tried recording video with this camera and the result is so sharp and clear. I love the color balance also. Even when recording on non-4K settings, the quality is amazing. See a sample video here:


Here are the video resolutions available on the Action Cam:
  • MP4: PS: 1920 x 1080 60 p / 50 p
  • MP4 HQ: 1920 x 1080 30 p / 25 p
  • MP4 HS120 (HS100):1280 x 720 120 p / 100 p
  • MP4 HS240 (HS200): 800 x 480 240 p / 200 p
  • MP4 STD: 1280 x 720 30 p / 25 p
  • XAVC S 120 p: 1920 x 1080 120 p / 100 p
  • XAVC S 240 p: 1280 x 720 240 p / 200 p
  • XAVC S 24 p: 1920 x 1080 24 p
  • XAVC S 30 p: 1920 x 1080 30 p / 25 p
  • XAVC S 4K 24 p: 3840 x 2160 24 p
  • XAVC S 4K 30 p: 3840 x 2160 30 p / 25 p
  • XAVC S 60 p: 1920 x 1080 60 p / 50 p
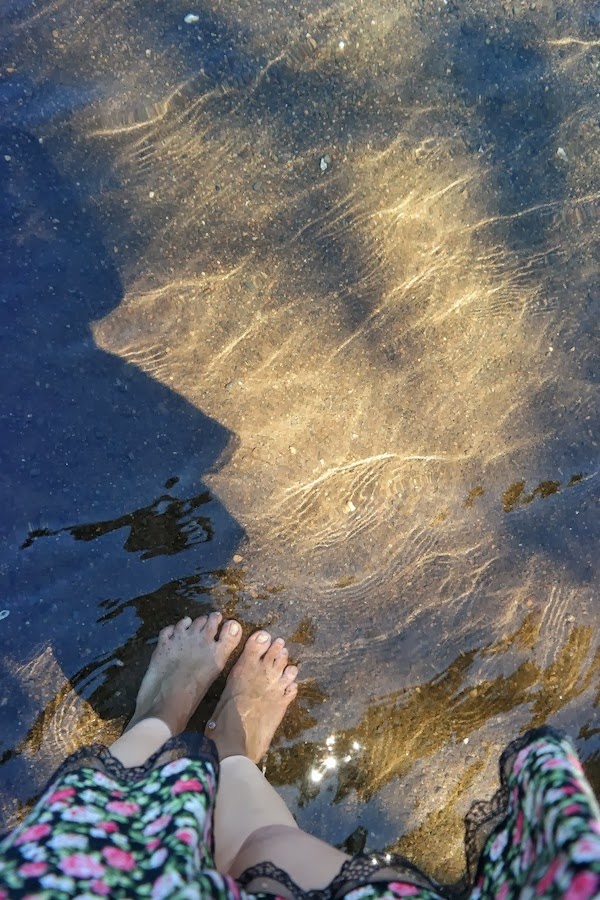
UNDERWATER MODE

No need to use any additional filter, look at the natural colors!
Action cams usually need an additional red filter for underwater shoots, but the Sony Action Cam already has a “water mode” that automatically adds red color that is usually faded when in water. This water mode gives natural color when filming, just like what we see when we snorkel or dive.


PS: For deep underwater use, you’ll need an optional dive door that will allow you to use the Sony Action Cam at an amazing 60 meters. The normal waterproof case is good to go till up to 10 meters, but to get sharper images and videos underwater you’ll need the dive door.


ACCESSORIES

Every action cam needs accessories to be able to take different points of view, and this is no exception with the Sony Action Cam. There are a lot of options provided by Sony, from a monopod (In Indonesia we usually call it “tongsis”), head mount, chest mount harness and even a backpack mount, you can choose depending on what you need. My favorite is of course the monopod that is easy to use and allows for different framing during recording with the Live-View Remote Kit when traveling.

Took this selfie using Live-View Remote for framing, then just click!
PLUS - MINUS

Of course there are pluses and minuses. The PLUS is of course the quality of the Sony Action Cam! I'm amazed with the result (never thought its video could be so sharp and clear. I definitely will always use this Action Cam to record my activities while traveling), it's also easy to connect to Wi-Fi, and it automatically turns off when not in use (no more overheating action cams). This allows it to spend less power, conserving more battery power for the whole day.

The MINUS is that I wish it could have a smaller LCD for framing. During underwater shoots, we cannot carry the Live-View Remote Kit, so I have to frame the composition based on my feelings. Even though it's super wide (so most photos are in good composition), but for me framing before recording is also important to get great photos or videos. Hopefully Sony will work on this for the next generation of Action Cams :)


Well, THAT'S ALL FOLKS!

If you're looking for an action cam with high quality, the Sony Action Cam is perfect for you!

@marischkaprue - ready for more actions!


4 Desember 2013

, , , , , ,

Tough Gadget for Tough Places


Saya tidak tahu mengapa saya lebih suka menikmati alam dibanding kota besar. Saya senang bepergian kemana pun namun justru bagi saya lokasi lokasi yang tampak sulit justru seringkali lebih menarik.

Melewati sungai di pedalaman Kalimantan Timur
Naik ketinting (perahu kayu kecil)
Ada beberapa lokasi dimana saya harus melewati perjalanan panjang, misalnya beberapa kali naik pesawat untuk sampai ke Malinau, Kalimantan Timur, atau delapan jam naik perahu panjang yang berukuran kecil untuk sampai ke Kapuas Hulu, Kalimantan Barat. Beberapa destinasi juga seringkali menuntut saya untuk menyeberang dengan kapal karena di pulau yang saya tuju tidak ada akses lain.

Saya juga menikmati naik gunung meski tidak sering melakukannya. Kesulitan mendaki gunung selalu memberikan rasa tersendiri dan kepuasan yang sebanding dengan perjalanan yang harus dilewati.
This is where my feet belong
and also here
Pantai dan gunung selalu jadi destinasi yang menarik bagi saya, namun sayangnya kurang bersahabat bagi perangkat elektronik. Saya harus menghindari perangkat elektronik ini terkena air laut jika ingin kamera saya tetap awet, saya punya kamera untuk mengambil gambar di bawah laut namun dengan housing khusus yang mesti dipasang setiap kali sebelum menyelam.

Nice view, tapi rawan kena cipratan air
Saat berada di kapal pun biasanya saya menyimpan smartphone di dalam dry bag agar tidak terkena cipratan air, saat di kolam atau pantai juga saya selalu meletakkan smartphone saya sebelumnya di posisi “aman.”

Tapi kini saya punya perangkat baru yang tahan di berbagai medan dan cukup tangguh untuk menemani saya traveling. Sony Xperia Z1 yang meski tampilannya sangat sleek namun ternyata tangguh untuk dibawa melewati destinasi yang cukup “kejam” untuk perangkat elektronik.

Ini dia beberapa hasil tes ketangguhan Sony Xperia Z1, dan pendapat saya mengenai perangkat yang satu ini:

·      Tahan air. Saya sebelumnya punya pocket kamera yang tahan air, namun sangat bulky desainnya dengan material karet di sekeliling. Xperia Z1 tidak terlihat seperti smartphone yang tahan air, desain tetap tipis dan ring karet yang melindungi beberapa slot seperti slot sim card, memory card ataupun untuk charger tidak mengganggu desain.

Tes ketahanan air dan air laut, check!
Saya mencoba ketahanan smartphone ini di dalam air dengan merendamnya di air tawar, yang menarik lubang audio jack tidak perlu ditutup saat Xperia Z1 direndam, benar benar seperti memasukkan smartphone biasa ke dalam air, namun tanpa takut mengucapkan selamat tinggal saat smartphone saya terendam.

Selanjutnya saya mencoba Xperia Z1 di laut (yes, I really wanna try this since the first time I got this waterproof smartphone). Mencemplungkan smartphone ini di laut memang tidak disarankan, namun saya memakai metoda yang sama untuk membersihkan perangkat penyelaman saya lainnya, yaitu membersihkan Xperia Z1 dari air laut dengan merendam di air tawar selama setengah jam untuk menghindari partikel air laut merusak material di smartphone ini.

Saya memang tidak bisa membawa smartphone ini untuk menyelam di kedalaman lebih dari 1,5 meter, namun sangat menyenangkan untuk dapat mengambil photo dari smartphone dengan kualitas kamera yang bagus (20,7 megapixel) dan langsung berbagi di social media saat saya snorkeling atau bersenang senang di pantai.

·      Tahan debu. Saya sebelumnya tidak terlalu aware dengan kekuatan Xperia Z1 terhadap debu, hingga saya trekking ke Bromo saat badai pasir sedang kencang kencangnya.

Saat itu bahkan saat mendaki saya memakai masker dan kacamata hitam untuk melindungi diri dari debu yang selalu terangkat saat angin kencang datang. Saya bahkan harus menutup mata setiap kali angin keras berhembus karena debu halus masih masuk melalui sela kacamata.

It survived Bromo strong dust!
Beberapa kali mengambil foto dengan kamera mirrorless, saya khawatir debu halus akan masuk ke sela sela tombol dan lensa sehingga saat badai pasir sudah benar benar keras, saya memilih memasukkan kamera saya ke dalam tas dan menggunakan Xperia Z1 untuk mengambil gambar.

Feeling good from up here
Hasil shot dengan Xperia Z1, mode superior auto
Surprisingly kamera 20,7 megapixel di smartphone ini menghasilkan gambar yang sangat baik, saya sangat suka hasil foto Xperia Z1 di Bromo, dan meski badai pasir saya hanya menaruh smartphone ini di kantong celana dan mengeluarkan dengan mudah saat ada momen yang menarik untuk difoto.

Karena slot di Xperia Z1 tertutup dengan baik (untuk ketahanan air juga), saya tidak khawatir debu akan merusak smartphone ini, bahkan saat pulang ke homestay, saya membersihkan Xperia Z1 dengan cara mencucinya dengan air, simple dan menyenangkan hehe..

Selain dua sisi tangguh tersebut juga ada beberapa fitur lainnya yang menarik bagi saya:

ü  Timeshift burst untuk mengambil gambar momen, tekan tombol untuk mengambil gambar selama 2 detik dan akan nada 61 gambar yang dapat dipilih untuk mencari momen terbaik.
ü  AR Effects. Saat menggunakan kamera dengan AR Effects, berbagai animasi sesuai pilihan akan muncul, misalnya dinosaurus yang tiba tiba muncul di lantai. Saya memang tidak dapat menggunakan hasil foto AR Effects sebagai materi blog saya namun aplikasi ini berguna saat iseng menunggu karena teknologi augmented reality yang membuat animasi yang muncul seakan lokasinya benar disitu. Cobalah bergerak berpindah posisi dan anda akan lihat animasi yang ada seakan lokasinya tetap di tempat yang sama.
ü  Triluminos display, yaitu teknologi layar dengan warna yang lebih baik dan video yang lebih tajam. Saya menyimpan beberapa video dan film di Xperia Z1 untuk ditonton saat berada di pesawat. Killing time easy way, dan jangan lupa membawa headset.
ü  Slot memory card, bagi saya ini penting karena saya senang menyimpan foto foto perjalanan di smartphone. Gunakan memory card hingga 64 GB dan voila! I got my travel photo album on my smartphone!

Fitur lainnya dapat dilihat disini

Jika sering bepergian ke lokasi lokasi yang cukup tangguh maka Xperia Z1 Sony Mobile ID sangat membantu, ada beberapa teman saya yang juga menggunakan smartphone yang sama namun tidak mencoba secara hardcore seperti saya haha

When you got something tough, bring it on!

@marischkaprue – tough enough to face the world